Oct 5, 2014

Ribbon Revelry!


Close To My Heart has a very cool BONUS this month. With every purchase of $65 or more, you get a free spool of Chevron Ribbon in either Ruby or Outdoor Denim thrown in with your order! Yay! 


So I've been having a little play with both ribbons and created two Pinterest-inspired Christmas cards. What do you think? Do you have a favourite?


Here are the ingredients and instructions if you'd like to make your own:

Ingredients:
White card and envelope, Value Pack
5 1/4” x 4” Ruby (or Outdoor Denim) Cardstock
5” x 3 3/4” White Daisy Cardstock
Approx 20” Ruby (or Outdoor Denim) Chevron Ribbon
2 1/4” x 1” Kraft Cardstock
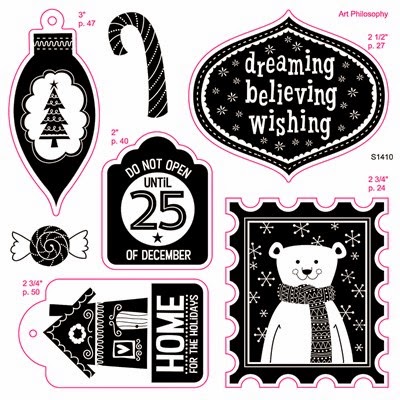
1” <star 4> cut with Cricut Art Philosophy Cartridge (p. 47)
Damask Embossing Folder
Clear Sparkles
Gold (or Silver) Shimmer Trim
Glue Dots
3L E-Z Dots Adhesive

Instructions:
1.    Emboss the piece of White Daisy Cardstock using the Damask Embossing Folder.
2.    Cut out the 1” star using the Cricut Art Philosophy cartridge.
3.    Stick strips of Gold Shimmer Trim very closely together (don’t leave any gaps between strips but don’t overlap) to cover an off-cut of cardstock (I used White Daisy) that is slightly bigger than the star that you have just cut out.
4.    Use the star as a template and trace around it on the reverse of the Gold Shimmer Trin covered Cardstock.  Cut out with Non-stick Micro-Tip Scissors.
5.    Adhere the Ruby Cardstock to the White card base.
6.    Adhere the embossed White Daisy Cardstock to the Ruby Cardstock.
7.    Hand cut the base of the tree by creating angled sides. Adhere a 2 1/4” length of the Shimmer Trim to the top of the Kraft Cardstock.
8.    Adhere the tree base in the middle of the bottom of the card.
9.    Using Glue Dots, arrange and adhere the Ruby Chevron Ribbon to the card.  The Ribbon needs to be kept in one single piece and not cut.  The corners are folded over and stuck down with the Glue Dots.  Press very lightly at first until you are happy with how the tree looks and then press down harder on the Glue Dots to hold the Ruby Chevron Ribbon in place.
10. Adhere Clear Sparkles to the Ruby Chevron Ribbon.
11. Using two Glue Dots, adhere the Gold Shimmer Star to the top of the tree.

If you are keen to receive a spool of this gorgeous Chevron Ribbon for FREE this month, all you need to do is purchase $65 or more in retail products.  Check out all of our beautiful products in my CTMH Online Store.

Happy crafting,

Denise xox


Oct 1, 2014

Home for the Holidays: CTMH October Stamp of the Month Australasian Blog Hop


Hello and welcome aboard our CTMH October Stamp of the Month Australasian Blog Hop. If you have arrived here from Vandra's Virtual CTMH Craftroom, then you are in the right place. If you landed here by accident, no problem, please join in by following the link at the end of this post. 


Today I would like to share with you these Christmas greeting cards which feature the October Stamp of the Month 'Home for the Holidays'  which is available exclusively throughout October 2014 for $27, or for just $5 when you spend $75. This stamp set is the latest of 12 glorious, exclusive Stamp of the Month stamp sets featured in our brand new CTMH 2014- 2015 Annual Inspirations Idea Book!


This month I decided to have fun with the October Stamp of the Month 'Home for the Holidays' and a couple of the card designs from the Workshop on the Go Snowhaven Cardmaking Kit.  I just love that we can use the layouts and cutting guides provided in Workshops on the Go Kits to inspire card and scrapbooking projects using different papers, Cardstock and stamps and still get a brilliant result every time! 


Card Project 1


My first project (above) is based on the Card 1 design from the Workshops on the Go Snowhaven Cardmaking Kit and features the October Stamp of the Month, ‘Home for the Holidays’.

Ingredients: 

4 1/4" x 5 1/2” White Card Base and Envelope
5” x 3 3/4” Glacier Cardstock
1 1/2” x 5 1/2" Snowhaven B&T paper (striped side)
3 1/4" x 2 1/4" Snowhaven B&T paper (black side)
3” x 2” White Daisy Cardstock (for stamping main image)
2” x 2” White Daisy cardstock (for stamping Glacier Heart)
Snowhaven WotG Cardmaking Kit Stamp Set (heart image)
Home for the Holidays, October 2014 SotM
Cranberry Exclusive Inks Pad
Slate Exclusive Inks Pad
Glacier Exclusive Inks Pad
3 x Red Enamel Hearts
1” strip Silver Shimmer Trim
Adhesives- Tape Runner, Thin 3-D Foam Tape, 3-D Foam Tape

Instructions:
  1. Stamp main image in Cranberry or Slate.
  2. Stamp heart in Glacier and cut out using Micro-tip Scissors.
  3. Assemble card as shown.
Card Project 2


My second card project is based on the Card 3 design in the Workshops on the Go Snowhaven Cardmaking Kit and features the October Stamp of the Month, ‘Home for the Holidays’.


Ingredients:

4 1/4" x 5 1/2” White Card Base and Envelope
2 1/2” x 4 1/4" Snowhaven B&T paper (striped side)
2 3/4” x 3 3/4” Whisper Cardstock
3” x 2 1/2” White Daisy Cardstock (for stamping main image)
3/4” x 4 3/4” Cranberry Cardstock
Home for the Holidays, October 2014 Stamp of the Month
Glacier Exclusive Inks Pad
2 x Red Enamel Hearts
Silver Shimmer Trim
Adhesives- Tape Runner, 3-D Foam Tape

Instructions:
  1. Stamp the main image on White Daisy Cardstock.
  2. Mount on Whisper Cardstock.
  3. Assemble card as shown (trim excess Cranberry Cardstock and Silver Shimmer Trim from edges of card.
  4. Attach Whisper cardstock with 3D Foam Tape.
  5. Add Red Enamel Hearts.

The October Stamp of the Month, ‘Home for the Holidays’ is only available until 31 October 2014 from your CTMH Consultant.  


Thanks so much for dropping by to check out my latest card projects.  I'd love you to leave a comment before heading off to the next stop,  Anne's Blog, Mummy You Made This?  

Do come and visit me again soon as I have lots of ideas to share with you this month!


Happy crafting,


Denise :)