

Today, I would like to share with you a set of Herringbone Cards I have made that feature the August Stamp of the Month, Framed. I think that this stamp set is truly a card maker's best friend. It has oodles of sentiments and the cutest frames that are just perfect for adorning the front and inside of cards designed for a multitude of occasions throughout the year. I just couldn't wait to try it out! This stamp set is available only in August 2015 for $27, or for just $5 when you spend $75 or more.

With only one month to go until the launch of the gorgeous new paper collections featured in the new 2015-2016 Annual Inspirations and Holiday Expressions Idea Books, and with the early release of the Zoe Paper Collection today (YAY!!!), I am in scrap-mode! What that means is that I am madly using up every last scrap of paper from my existing Paper Packets to make way for the new!
I don't know about you, but I can't bear to throw away any of our gorgeous paper, no matter how small. If you are like me, then don't despair! I find that there are certain card designs that are just perfect for people like us! One of my favourites is the Herringbone design. I first saw this design featured on a beautiful card and scrapbook page created by the very talented Christine (Chris) Woodward (her Blog Woodies Creations is well worth a visit). Ever since then, I have been in love with this simple, but effective way to use up scraps and create beautiful cards at the same time!
For this set of cards, I went to my Brushed Paper Packet (only available until the end of August) and tipped out the remaining pieces of paper left over from numerous creative scrapbooking and cardmaking projects. It really is amazing how far these Paper Packets can stretch, isn't it?
Preparing for these cards was easy! I got out my SureCut Deluxe Craft Paper Trimmer and cut all of the remaining paper and cardstock from the Paper Packet into 1/2 inch strips.
Next, I cut a piece of White Daisy Cardstock measuring 3 3/4" x 5" as the base for creating the Herringbone design. I took one of the strips of Brushed paper and adhered it to the cardstock diagonally from one side to the other, trimming both ends.

I then adhered another strip extending from the centre to the top of the card and another strip from the centre to the bottom of the card and trimmed both ends.


This is the basic set-up for the Herringbone design. It creates four "quadrants" that are then filled with more strips of the paper and coordinating cardstock. Filling in the quadrants is easy! I just apply adhesive to the back of a strip, position it snugly beside the previous strip and press down to secure it on the base until all of the cardstock is covered. You'll notice that the quadrants diagonally opposite each other have the strips running the same way, but a different way to the quadrant beside them.

When I had filled all four quadrants with 1/2" strips, I trimmed around all of the edges with my Non-stick Micro-tip Scissors. These are just perfect for this job as they are super sharp, cut close to the edge and are incredibly precise.

I repeated this process to create 6 Herringbone designs altogether.

Next, I mounted the Herringbone designs onto Cranberry Cardstock mats measuring 4" x 5 1/4". As Cranberry is one of the coordinating colours for Brushed, but not actually used in a big way in any of the Herringbone designs I created, I thought it would be perfect and I was very happy with the way the colour framed the designs and really made them pop!

I then adhered these to the front of of white cards from our 5 1/2" x 4 1/4" White Cards and Envelopes Value Pack
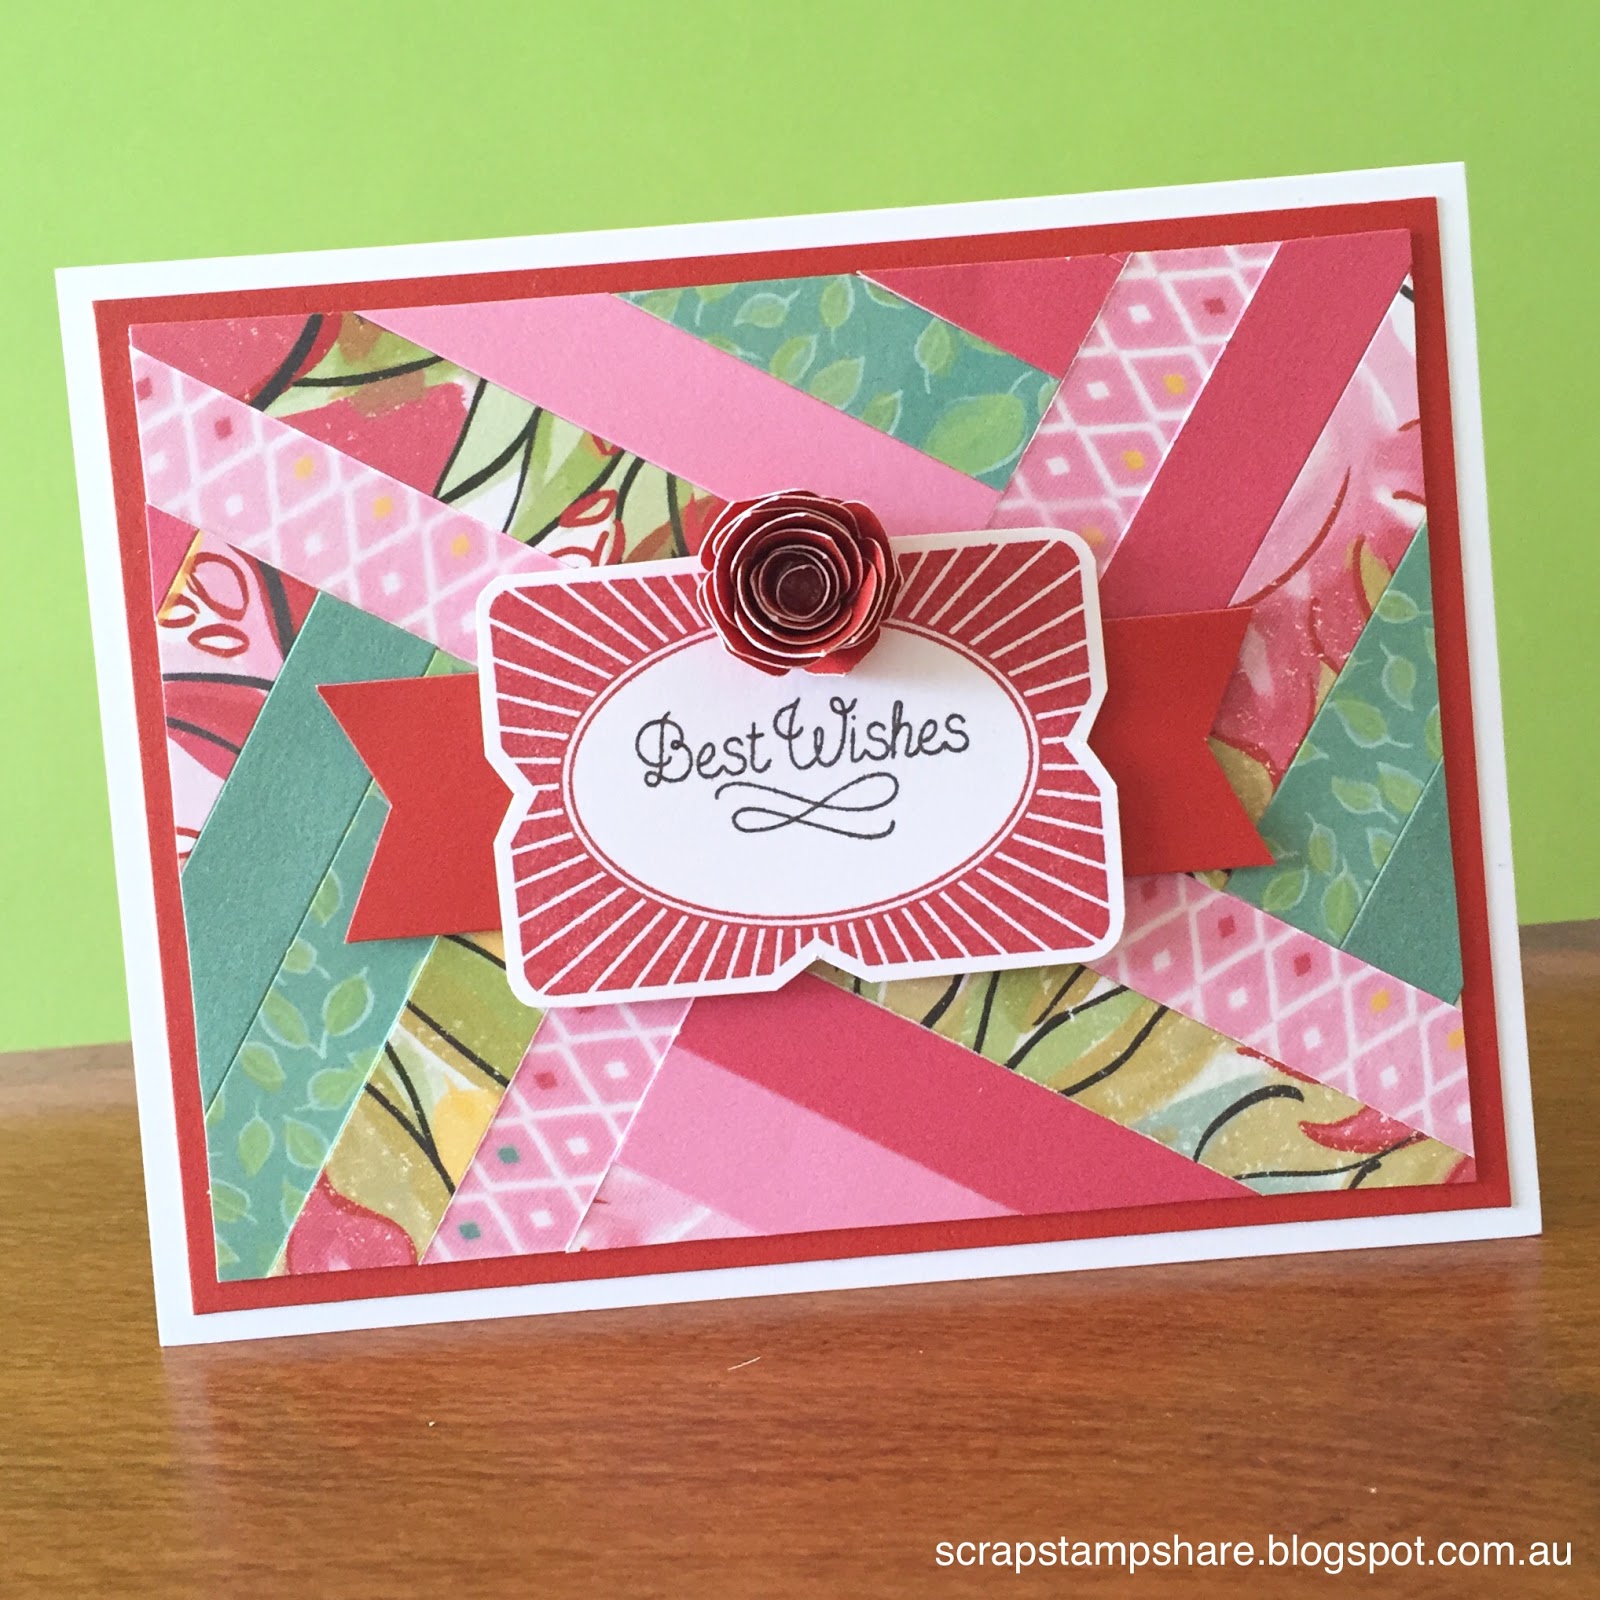
After that, I went all stamp happy with the August Stamp of the Month, stamping multiple frames and sentiments, mixing and matching with my Black and Cranberry Exclusive Inks Stamp Pads.


Once again, I used my amazing Non-stick Micro-tip Scissors to cut around each of the frames. Adhered them to Cranberry Cardstock, cut around them again and mounted them on the front of the cards with 3-D Foam Tape.

Next I went to my rolled roses stash and picked out some roses made from coordinating cardstock colours (Hollyhock, Canary, Cranberry) and adhered them to the front of the cards using Mini Glue Dots. I thought they added a little bit of "something special" to each of the cards.
So finally, here are my completed Herringbone cards. Ta Da!


What do you think? I am always amazed at how gorgeous the finished card looks. This is such a quick card to create and most importantly, is the perfect way to use up all of your paper scraps.
Ingredients used to create this project:
Framed- August Stamp of the Month
Brushed Paper Packet (scraps cut into 1/2" strips)
White Cards and Envelopes, Value Pack
3 3/4" x 5" White Daisy Cardstock
4" x 5 1/4" Cranberry Cardstock
Black Exclusive Inks Stamp Pad
Cranberry Exclusive Inks Stamp Pad
SureCut Deluxe Craft Paper Trimmer
Non-stick Micro-tip Scissors
Cricut Art Philosophy Collection (for cutting the roses)
Cricut Artiste Collection (for cutting the roses)
Quilling Tool (for rolling the roses)
Liquid Glass (for adhering the roses)
Memory Book Mini Glue Dots
3-D Foam Tape
And just because I couldn't resist, here are two more cards featuring the Herringbone design and the August Stamp of the Month, created from my Yuletide Carol paper scraps.


Thank you for visiting my Blog to check out my special project featuring the August Stamp of the Month, Framed I would love it if you could leave a comment below before you hop to the next stop on our Australasian Blog Hop, Mandy Hall's Hall of Indulgence to see more creative ways to use the August Stamp of the Month.

Remember, the August Stamp of the Month, Framed is only available throughout August 2015 from your Close To My Heart Independent Consultant for $27, or for just $5 when you spend $75 or more.
Warmest crafting wishes,
Denise :)
11 comments:
These are fab & a great way to use up scraps & look so effective. Thanks for sharing
Another great technique, and cards. Thanks for the instructions.
Thank you for sharing how to do the herringbone technique. The cards are great for all occasions.
Great use of precious scraps. I save all mine too.
Wow, i will definitely have to give the herring bone technique a try, thank you so much for sharing how too. Love all the cards and the paper combo, and the christmas cards are my favourites.
Thank you so much! Love the herringbone technique, and will definitely have to give it a go, now that I've seen your beautiful examples. Thank you so much.
I love the Herringbone technique and you have done a fabulous job with it!
The Herringbone design looks amazing with these sentiments and frames. I love how prolific you've been with your card making ideas this month.
Just lovely Denise, you always do gorgeous creations. I've tried the herringbone for the first time this weekend and just love it!
Just beautiful Denise i love that technique
I love how the two colour combinations look so different just by changing the papers. Wonderful cards. Thanks!
Post a Comment