Apr 1, 2015

Typed Note- CTMH April Stamp of the Month Australasian Blog Hop


Hello and welcome aboard our CTMH April 2015 Stamp of the Month Australasian Blog Hop. If you have arrived here from Georgia Creates, then you are in the right place. If you landed here by accident, no problem, please join in by following the link at the end of this post. 

Today, I would like to share with you my vintage-style cards and tags that feature the April Stamp of the Month 'Typed Note'.  This stamp set is available only in April 2015 for $27, or for just $5 when you spend $75. It is the latest of 12 glorious, exclusive Stamp of the Month stamp sets featured in our CTMH 2014- 2015 Annual Inspirations Idea Book.


This is such an adorable stamp set, perfect for creating embellishments for page layouts and cards.  The 
vintage typewriter is so on-trend right now and the huge number of sentiments included with this stamp set will give you so many options for including just the right message on your project!

Nothing says "Vintage" to me more that Cocoa ink distressing on our gorgeous Kraft Cardstock! So that's where I started with my Stamp of the Month project for this month.  I had a pretty clear picture in my head of what I wanted the finished cards and tags to look like and I was so excited when our brand new Jackson Paper Packet had the colours in it that I knew would complement the vintage-style I was aiming to achieve.  Once I had my colours organised, everything else fell into place!


I started by creating this set of 5 cards using the following products:

Colonial While Card and Envelope (from the Value Pack)
5 1/2" x 4 1/4" Kraft Cardstock
4" x 3" Kraft Cardstock (for stamping the typewriter)
4 1/2" x 2 1/2" Tag cut from Kraft Cardstock (Cricut Art Philosophy, Tag 4, 4.5", p.60)
5" x 3 3/4" Jackson B&T Paper
2 1/2" x 1/2" strip of coordinating Jackson B&T Paper (for the top of the tag)


Here are three of the cards I created.  They came together so quickly by following the steps below:

1.  Stamp the typewriter and sentiment of your choice (there are 17 to choose from) onto Kraft Cardstock in Cocoa Ink and cut around the outside with your Non-stick Micro-tip Scissors.
2. Ink around all of the pieces of Kraft Cardstock and Jackson Paper with your Cocoa Dauber.
3. Stick the large piece of inked Kraft to the front of the card base, then adhere the piece of inked Jackson Paper.
4. Mount the typewriter onto the tag using Thin 3-D Foam Tape.
5. Cut and then staple the decorative paper to the top of the tag using your Mini Stapler.
6. Mount the tag onto the card using 3-D Foam Tape.


I also wanted to create some gift tags!  I cut some additional tags with the Cricut and I tore some of the left over Jackson paper scraps to add a splash of colour to the tags, inked the paper and Kraft Tag and stamped and cut out the typewriter.  I assembled them as shown and ta-da, some cute little gift tags!
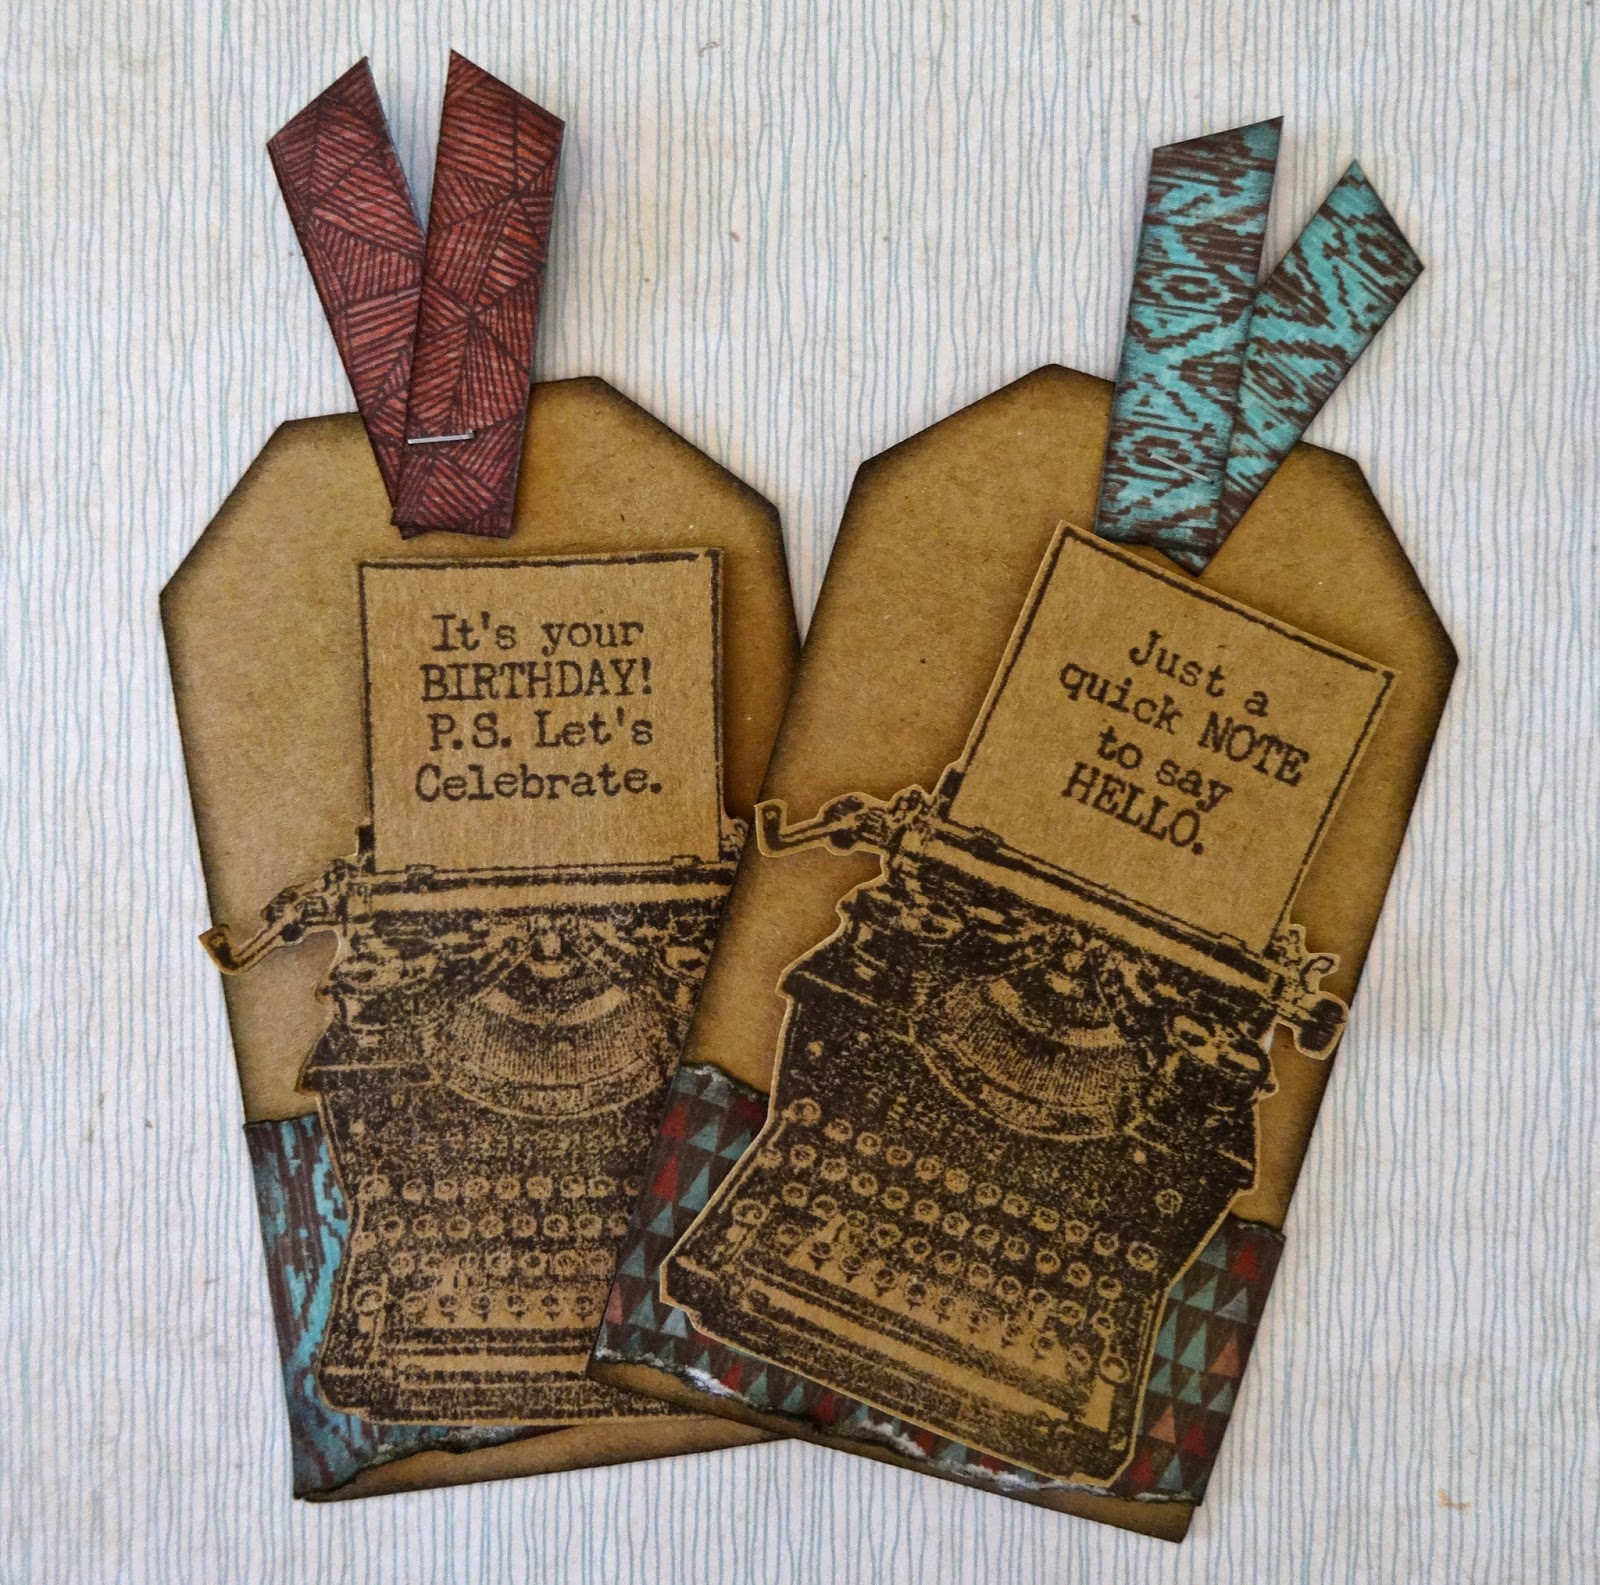


Well, I hope you like my vintage-style cards and tags featuring the April Stamp of the Month.  Please do leave a comment below before you hop onto the next stop on our Australasian Blog Hop, Maz's Inky Fingers to see more creative ways to use the April Stamp of the Month.


Remember, the April Stamp of the Month 'Typed Note' is available throughout April 2015 from your Close To My Heart Independent Consultant for $27, or for just $5 when you spend $75 or more.  

Warmest crafting wishes,
Denise :) 


Mar 28, 2015

“You’re Special” Greeting Card


Here's a super-quick card featuring the March Stamp of the Month, Choose Happy!


Ingredients:
White card and envelope (Value Pack)
March Stamp of the Month, Choose Happy
5 1/4” x 2 1/2” Heartstrings B & T paper (Cranberry hearts side)
5 1/4” x 1 1/4” Hollyhock Cardstock
5 1/4” Heartstrings Zip Strip (arrow design)
3 1/4” x 2 1/2” White Daisy Cardstock
Hollyhock Exclusive Inks Stamp Pad
1 heart from the Stuck on You Puffies
3 Clear Sparkles
Damask Embossing Folder
3L® E-Z Dots® Adhesive
3-D Foam tape

Instructions:
1.   Stamp the scallop frame stamp and the ‘you’re special’ sentiment in Hollyhock ink onto the White Daisy Cardstock.
2.   Cut around the frame using Non-stick Micro-tip Scissors.
3.   Emboss the Hollyhock Cardstock using the Damask Embossing Folder.
4.   Assemble the card as shown above.
5.   Adhere the sentiment using 3-D Foam Tape.
6.   Add the 3 Clear Sparkles along the bottom on the left side of the card.


“Bunches of Love” Greeting Card


The original design for this card came from a very talented member of my team, Michelle Firth.  I think it is just adorable, with oodles of gorgeous flowers that make it just perfect for giving to a special mum this Mother's Day. 

Here's what you need to do to make it for your own mum:

Ingredients:
White card and envelope (Value Pack)
A Budding Friendship stamp set
Flowers for Mum stamp set
3 3/4” Juniper circle (cut using Cricut Art Philosophy Cartridge)
6” x 6” White Daisy Cardstock (for stamping)
Gypsy Exclusive Inks Stamp Pad
Sorbet Exclusive Inks Stamp Pad
Cotton Candy Exclusive Inks Stamp Pad
Lagoon Exclusive Inks Stamp Pad
Pear Exclusive Inks Stamp Pad
Topiary Exclusive Inks Stamp Pad
Slate Exclusive Inks Stamp Pad
Embossing Folder (the card uses Honeycomb)
3L® E-Z Dots® Adhesive
Thin 3-D Foam Tape
3-D Foam Tape

Instructions:
1. Trim the top and bottom off the Juniper circle to create the “vase”.
2. Stamp 2 large flowers (Gypsy and Sorbet, outlined with Slate ink).
3. Stamp 3 small flowers (Cotton Candy and second generation Lagoon, outlines with Slate ink).
4. Stamp a number of small and large leaves (Pear and Topiary, outlined with Slate ink).
5. Cut out the flowers and leaves using Non-stick Micro-tip Scissors.
6. Stamp the ‘Happy Mother’s Day’ sentiment from the Flowers for Mum stamp set in Slate ink and then emboss the vase above the sentiment.
7. Adhere the vase to the card base using 3L® E-Z Dots® Adhesive.
8. Arrange the flowers and adhere them using Thin 3-D and 3-D Foam Tape to achieve different levels.

Mar 27, 2015

Heartstrings Double Z-Fold Card


I love fancy-fold cards! Here is a double Z-Fold Card that I taught recently at my March Cardmaking Workshop.  It's so easy to make, but the end result is so impressive.  It's a card with a wow-factor, so the person receiving it will think you spent ages creating it.  I won't tell them that you didn't!

Here's how to make it:    

Ingredients:
Happy Autumn stamp set
6” x 12” Whisper Cardstock
5 3/4” x 1 7/8”Heartstrings B & T paper (Juniper diamond side)
5 3/4” x 1 7/8” Heartstrings B & T paper (Cranberry hearts side)
5 3/4” x 3 7/8”Heartstrings B & T paper (Cranberry hearts side)
5” x 3 1/4” White Daisy Cardstock (inside)
4” x 2 3/4” White Daisy cardstock
4 1/4” x 3” Hollyhock Cardstock
4 3/8” x 3 1/8” Slate Cardstock
3” x 2 1/2” White Daisy Cardstock (for stamping flower)
Pixie Exclusive Inks Stamp Pad
Hollyhock Exclusive Inks Stamp Pad
Cranberry Exclusive Inks Stamp Pad
Pear Exclusive Inks Stamp Pad
Topiary Exclusive Inks Stamp Pad
Cocoa Exclusive Inks Stamp Pad
3L® E-Z Dots® Adhesive
3-D Foam Tape


Instructions:
1.    Score the Whisper Cardstock at 2”, 4”, 8” and 10” and fold to create the Double Z-Fold.
2.    Adhere the B&T Paper to the inside and front panels of the card.
3.    Create the flower by inking up the bottom of the stamp (flat side) with Pixie ink and stamping it onto the White Daisy Cardstock. Clean and let the stamp dry before flipping it over.  Now ink the flower in Hollyhock ink and then Rock ‘n’ Roll the flower in Cranberry ink so it is on the outside edges of the flower.  Stamp the image on top of the Pixie image trying to cover as much of the Pixie as possible.
4.    Cut out the flower using Non-stick Micro-tip Scissors.
5.    Ink the leaf stamps in Pear ink and Rock ‘n’ Roll the leaves in Topiary ink.  Stamp two small and one large leaf onto the top of the 4” x 2 3/4” piece of white cardstock.  Stamp the sentiment below in Cocoa ink.
6.    Adhere the flower on top of the stamped leaves using 3-D Foam Tape.

7.    Choose one of the other stamps to decorate the inside piece of White Daisy Cardstock using the Rock ‘n’ Roll technique. Adhere to the inside.

Until next time.

Crafting wishes,
Denise :)